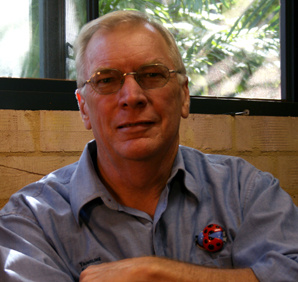
Working with wood runs in Vaughn’s family. He is a third generation Western Australia woody, and like many Australian school kids he first used a wood lathe at High School, but it wasn’t until the early 1980s that he bought his first lathe and ˜had a go” at woodturning.
It didn’t take Vaughn long to master the basic skills, and he was soon producing innovative, exhibition quality work, using subtle additions including gold, pewter, copper, brass, and acrylic paints to enhance the beauty of the wood and the turned form. The dedication and time taken to hone the skills of woodturning have been worthwhile. He reckons that after 30 years of turning, he has probably served his apprenticeship. He teaches, writes, demonstrates woodturning, and exhibits his work internationally, and is always willing to pass on skills and information regarding his chosen vocation. He has seen, and been part of the emergence of Artistry in Woodturning,
A challenging time where lathe turned objects were enhanced and decorated to the stage of becoming a contemporary art form. His work is influenced by the Art Nouveau period, not only for the extraordinary work produced in that time, but for the progressive attitude of the makers. A time when craftspeople and artists rejected the ordinary and mundane, and embraced with enthusiasm the asymmetrical designs, organic natural shapes, and the sensual curves and lines of this period of Art. It is the translation of these ideas and influences into beautiful contemporary wood art, that continues to motivate Vaughn as a Woodturner.
Like that shape - make that shape
Turnings that have a really nice shape can be achieved by having a good look at the item that you are influenced by, and determining if a shape similar to that item can be turned out of wood. One needs to take into account the technical aspects of achieving this:
Size. Do I have the correct wood material that suits the proportions of the item
Skills. Have I the technical ability to create a copy of the item in wood
Tools. Do I have the appropriate tools and equipment available.
There are many manmade and natural items that fit into the category of 'Nice Shape'
One well copied shape is based on Grecian vases and urns. Most of these ancient vessels have a very functional shape that is also beautiful in appearance. These shapes have been copied for centuries.
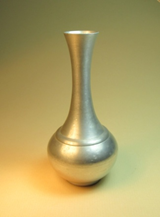
Nicely shaped Pewter Vase
The first part of this demonstration will use the shapes of various vases as a guide to making wood turned vases. The similarity with these items may possibly end there, as woodturners can be flexible with the shape of the woodturning, and have a whole range of design and decorating options once the turned shape is completed. These include painting, carving, inserting other medium, dimpling, pyrography etc. Or commonly known amongst Woodturners as 'The fun bit'
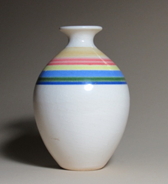
Painted pottery vase
Continuing on the theme of shapes to copy, the next section of the demonstration will use the shape of a beautifully made cotton coiled bowl.
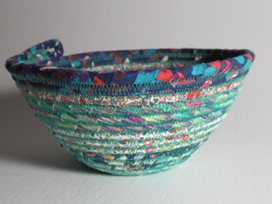
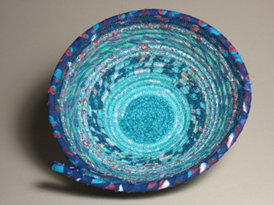
Hand made Cotton coiled bowl in *Liberty fabrics.
(permission to copy is granted to Vaughn by the maker. D Fisher.)
*Libertys, an English Store specializing in textiles, opened by Arthur Lasenbury Liberty in 1875
Once again this bowl shape is of ancient origin, and the woodturning created from observing this beautifully made item will be enhanced by painting or texturing.
Note: It is important that you create your own individual work. A direct copy of a person's work without their permission is Plagiarism. Generally, copyright for artistic works exist for 70 years from the year of the makers death.
Making Wood look Good
What a wonderful way to use all those small off cuts! Especially when the wood is a bit special. Sandalwood, Ebony, Tiger Myrtle, and those other hard to get timbers can be turned into items of jewellery.
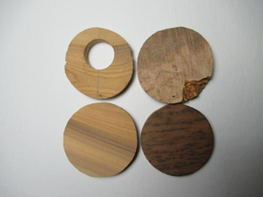
Jewellery off-cuts: Sandalwood. York Gum Burl. Tiger Myrtle.
Wood jewellery has been made for many thousands of years, and therefore doesn't have too many restrictions on what you make.
We will concentrate on creating neck pieces. They are popular and depending on the material and style, could be worn by anyone.
Selecting Jewellery to wear is a very personal choice for most people. Wood has an advantage in that it is a completely natural product. It is very tactile and comes in a wonderful range of colours and patterns.
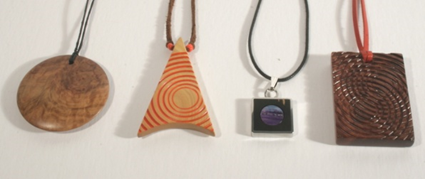
L to R. York Gum Burl. Sandalwood. Ebony in a stainless steel frame. Jarrah
Handmade wood jewellery is usually received very well as a gift because it has that personal touch that mass produced items cannot convey. You can pretty much guarantee that each item will be unique and individual.
This demonstration will focus on some different methods to create beautiful wood jewellery, from basic disc forms through to interesting techniques for creating neck pieces, all on the Wood lathe.
Adding Value to Bowl Blanks
Often when we are woodturning, we look at the primary product that we are expecting from the woodturning blank that's spinning around on the lathe. We plan on creating a bowl, a dish, or a platter.
With a little extra work we can gain another functional piece from that blank rather than a pile of nice curly shaped shavings on the workshop floor.
Hidden within the blank could be a really nice picture frame!

A beautiful Jarrah frame made from the back of a bowl blank.
So! how does this work?
Firstly, the woodturning blank needs to pass a comprehensive inspection:
No splits or cracks. For safety reasons, Don't use faulty or cracked blanks for picture frames.
Check the grain orientation, quarter sawn blanks may not twist as much as edge sawn blanks
No bug holes.
After it is determined that the woodturning blank is sound and suitable for the purpose, then the design process for the original work can be considered. This is the primary reason for the turning, and the frame is an added bonus.
The exterior shape of the work (we will use a Bowl as an example) is determined first, and the wood turning blank is roughed out, leaving the 'frame ring' which will form the inside shape and the back of the frame.
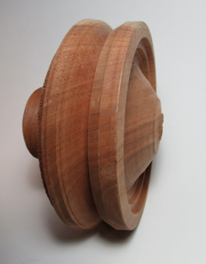
This is where the 'frame ring' comes from, leaving the bowl form intact.
Once this is done, it is easy to see where the frame ring comes from.
Be careful in determining this, as you need to leave the original bowl shape intact, and have enough thickness for a picture frame. The 'back' of the picture frame can now be finished, leaving a step deep enough for the picture, the backing material, and glass, if desired.
With a parting tool, carefully cut through the 'front' of the ring (which is the outside of the bowl) It's a good idea to bring the tailstock up to the base of the bowl, so the ring will spin onto this after separating from the blank without damage. The bowl can then be finished in the normal manner.
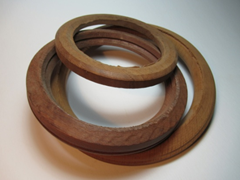
Roughed out frames ready for finishing
If the moisture content of the blank is unknown, or the timber variety is prone to twisting or warping, then store the ring in a suitable place until the movement in the wood has stabilised.
To Complete the Frame.
The back of the frame ring will have been finished on the lathe as mentioned above. If it was necessary to store the ring to allow for twisting to settle, then re-turn the back first, and turn out any twist or distortion. Sand back to a finish grit (at least 600) and seal. We need a nice flat, even, surface. The back of the frame ring is then glued to a larger flat faceplate, which can be marked with circles to determine the centre. That's why we need to have the back of the frame flat!
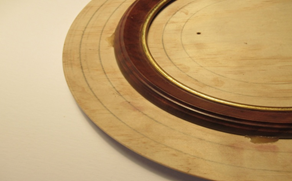
The back of the frame ring glued to a large flat faceplate, marked with
circles to assist in centering the ring
Complete the turning on the front of the frame ring in a design that suits. This can be traditional or modern, then enhance the frame with colour, stain, gold leaf, or some nice carvings.
All that's left is to insert the picture, screw in a hook, select your wall, and hang your frame up!
